

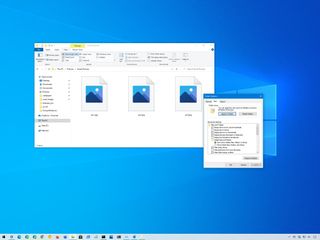
How To Enable Thumbnails In Windows 10
On Windows 10, File Explorer has the ability to display various sizes of thumbnail images for files, folders, documents, pictures, and videos to give you lot a quick preview of the content without having to open them.
Although it'southward a useful feature that adds a visual queue to find files faster without even looking at their names, it can take some organization resources to render and cache all the previews, particularly in locations with many images.
If your device is taking a long time to load the previews, you're troubleshooting a problem, or you're non interested in using this feature, Windows 10 includes at least three ways to disable thumbnails to show file icons instead of using File Explorer, Settings, and Group Policy.
In this Windows ten guide, we'll walk you through the steps to disable (and enable) thumbnails for files in File Explorer.
- How to enable or disable thumbnails using File Explorer
- How to enable or disable thumbnails using Settings
- How to enable or disable thumbnails using Grouping Policy
How to enable or disable thumbnails using File Explorer
On Windows x, the easiest way to disable or enable thumbnail previews for files is to use the File Explorer settings.
Disable file thumbnails
To disable thumbnails, utilise these steps:
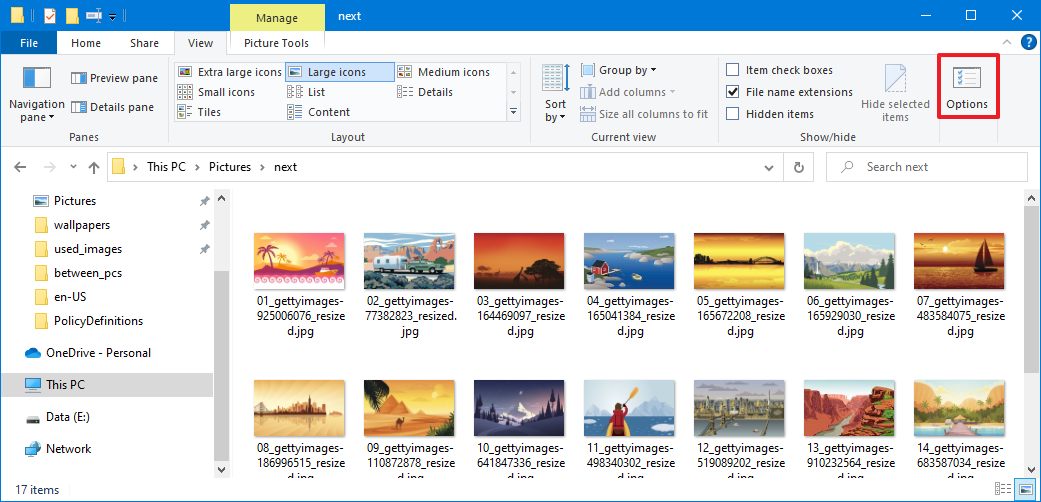
- Open File Explorer.
- Click the View tab.
- Click the Options push.
- Click the View tab.
- Under the "Advanced settings" section, check the E'er prove icons, never thumbnails option.
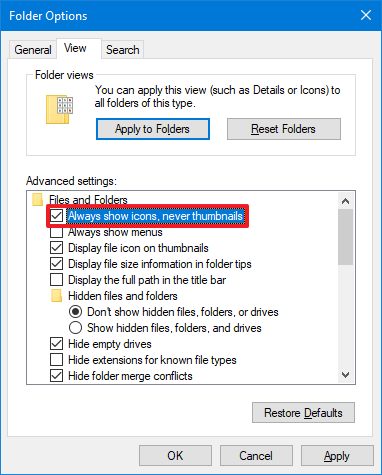
- Click the Apply button.
- Click the OK button.
Once you lot complete the steps, files will announced every bit icons without previews.
Enable file thumbnails
If you ended up in this guide because thumbnails are not showing in File Explorer, it's possible that for some reason or system update, the characteristic got disabled by error.
To enable thumbnails for files on Windows ten, use these steps:
- Open File Explorer.
- Click the View tab.
- Click the Options button.
- Click the View tab.
- Under the "Advanced settings" section, clear the Always prove icons, never thumbnails option.
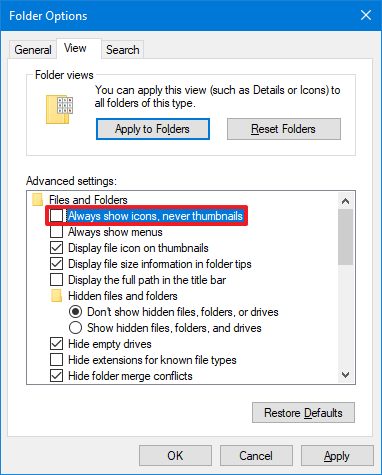
- Click the Apply button.
- Click the OK button.
After you complete the steps, previews volition now appear for files in File Explorer. If, afterwards adjusting the settings, you don't see the thumbnails, and so restart File Explorer and repeat the instructions one more time.
How to enable or disable thumbnails using Settings
You tin can as well employ the Settings app to access the visual effects settings that let you to enable or disable thumbnail previews, among other appearance and operation furnishings.
Disable file thumbnails
To disable the thumbnails for files using the visual effects settings, utilise these steps:
- Open Settings.
- Click on System.
- Click on About.
- Under the "Related settings" section, click the Advanced system settings pick in the right pane.
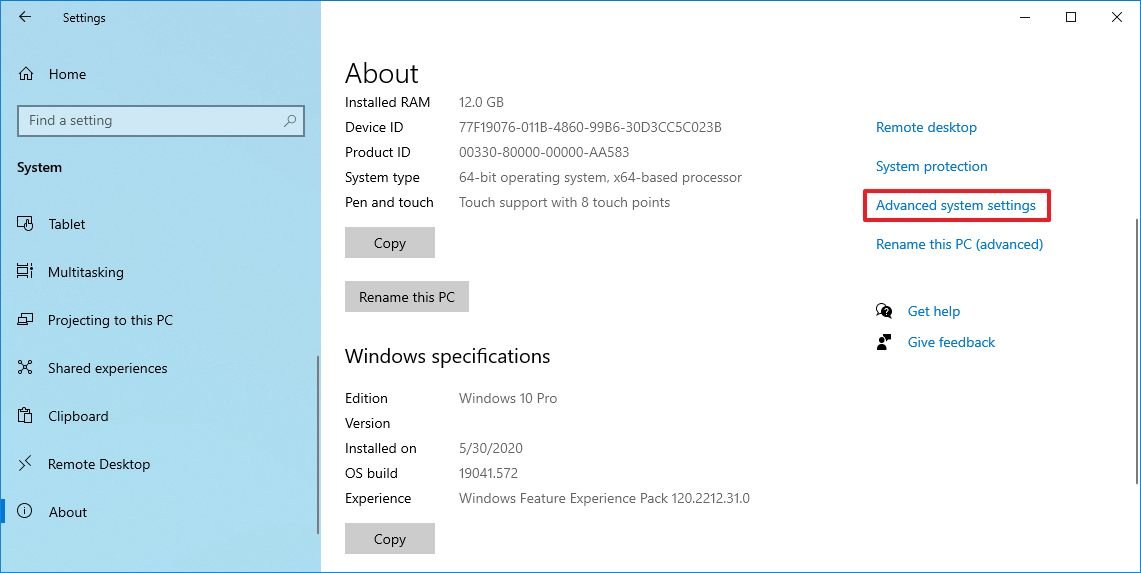
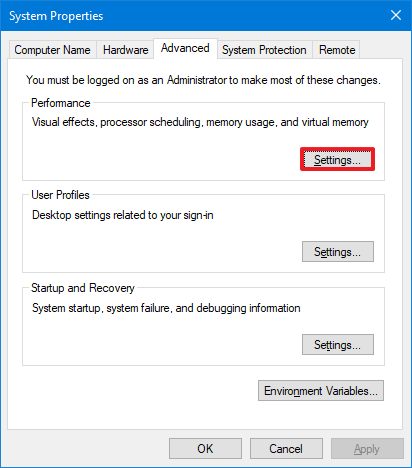
- Click the Advanced tab.
- Nether the "Performance" section, click the Settings button.
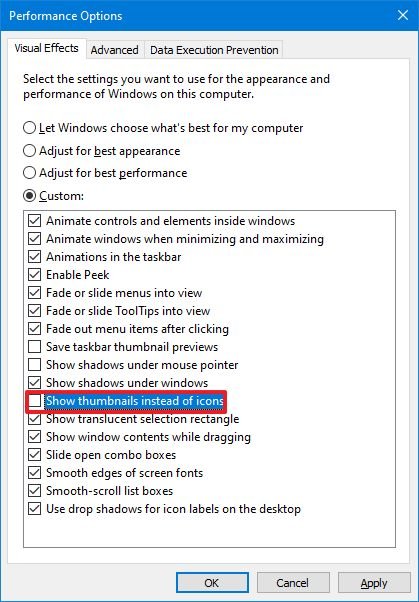
- Click the Visual Effects tab.
- Articulate the Show thumbnails instead of icons option.
- Click the Apply push.
- Click the OK button.
Once you complete the steps, File Explorer will no longer show thumbnails for files.
Enable file thumbnails
To utilise the visual effects settings to re-enable thumbnails, utilize these steps:
- Open Settings.
- Click on System.
- Click on About.
- Nether the "Related settings" section, click the Advanced system settings option in the right pane.
- Click the Advanced tab.
- Under the "Performance" department, click the Settings button.
- Click the Visual Furnishings tab.
- Check the Prove thumbnails instead of icons option.

- Click the Apply push button.
- Click the OK push.
After yous complete the steps, files should appear with the respective previews in File Explorer.
How to enable or disable thumbnails using Group Policy
Alternatively, you tin fifty-fifty manage the brandish of thumbnail previews using Group Policy.
Disable file thumbnails
To disable thumbnails with Group Policy, use these steps:
- Open Start.
- Search forgpedit.msc and clickOK to open the Local Group Policy Editor.
- Browse the post-obit path:
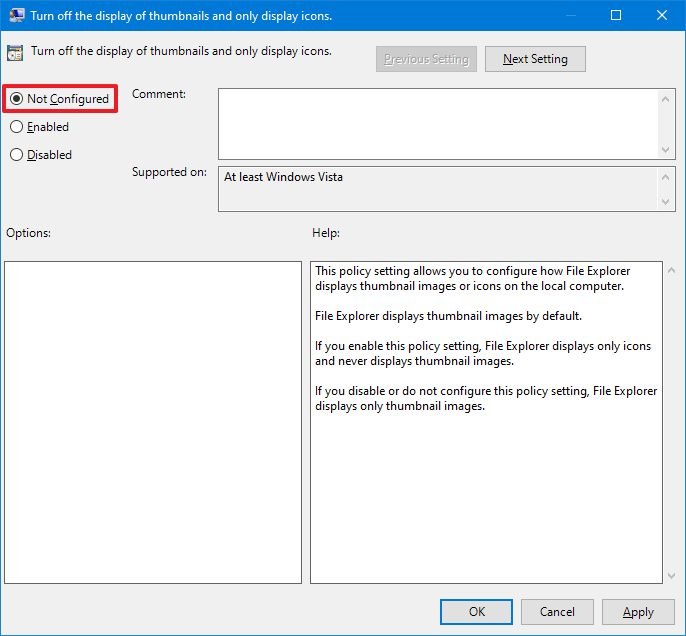
User Configuration > Administrative Templates > Windows Components > File Explorer - On the right side, double-click the Turn off the display of thumbnails and only display icons policy.Quick annotation: Using Group Policy, you can also choose to only disable thumbnails for network folders with the "Turn off the display of thumbnails and only display icons on network folders" policy.

- Select the Enabled choice.

- Click Utilise.
- Click OK.
Once you consummate the steps, users will no longer run across thumbnails for files while the policy remains enabled.
Enable file thumbnails
To show previews for files with Group Policy, use these steps:
- Open Start.
- Search forgpedit.msc and clickOK to open the Local Group Policy Editor.
- Browse the following path:
User Configuration > Administrative Templates > Windows Components > File Explorer - On the right side, double-click the Turn off the display of thumbnails and only display icons policy.
- Select the Not configured selection.
- Click Use.
- Click OK.
After you complete the steps, thumbnails previews will be bachelor for files in File Explorer. If y'all can't run across the previews, you may need to restart the device to apply the changes.
Whatever method yous cull to disable thumbnails, recall to use the aforementioned method to re-enable the feature. If you still take problems displaying previews, you may exist able to resolve the issue with these steps.
Source: https://www.windowscentral.com/how-disable-thumbnails-windows-10
Posted by: penaknotans.blogspot.com
0 Response to "How To Enable Thumbnails In Windows 10"
Post a Comment